MozillaTracker är ett litet logganalysverktyg som spårar vilka webbläsare och operativsystem användare av en webbsida har. Loggfilen behöver inte vara i något specifikt format. Du kan spara den insamlade statistiken som en rapport i text- eller HTML-format (exempel) eller skriva ut den direkt.
Listorna kan sorteras, antingen alfabetiskt eller efter antal träffar. Du kan också välja att visa webbläsarlistan med alla olika versioner av webbläsarna, bara de vanligaste versionerna (se skärmdump) eller bara webbläsartitlarna.
WAP Prototype Maker är ett verktyg för att snabbt generera en uppsättning WML-sidor.
Genom WAP Prototype Makers användargränssnitt kan du mycket enkelt och snabbt skapa en komplett hierarki av sidor som innehåller texter, bilder och länkar.
Syftet med detta program är att snabbt kunna skapa och testa navigeringen av en WAP-sajt, eller att skapa grundläggande sidor för en WAP-sajt för att få en snabb förhandsgranskning och sedan redigera dem för hand.
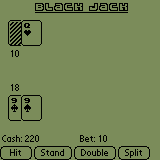
Ett litet och snyggt Black Jack-spel för Palm med det grundläggande black jack-spelet (inklusive dubbel, split och försäkring).
Kräver en Palm-kompatibel enhet som kör Palm OS v2.0 eller senare (av okända anledningar verkar den dock inte fungera på Treo-telefoner).
Observera att om du får slut på pengar kan du välja Nytt spel i menyn för att starta om. Det har också rapporterats att Black Jack inte fungerar på Treo-telefoner.
Ladda ner hela 15-dagars provversionen av Hattrick Manager. Observera att när provperioden har gått ut kommer en del av funktionerna att bli begränsade, men du kan fortsätta att använda Hattrick Manager.
Vänligen kontrollera registreringssidan för mer om att beställa den fullständiga versionen.
Hattrick Manager har testats framgångsrikt med Windows 95/98/ME/NT4/2000/XP (med de senaste servicepaketen och patchar tillämpade). En skärmupplösning på minst 1024×768 rekommenderas.
Den nedladdningsbara filen är körbar – ladda bara ner och kör den för att installera. Om du uppgraderar från en gammal version installerar du bara den nya versionen på samma plats (du behöver inte avinstallera).
Den senaste versionen av Hattrick Manager är v2.39 och den släpptes 10 januari 2005. Om det behövs finns den tidigare versionen tillgänglig.
Språk
Dessa är språken som för närvarande ingår, fler läggs till eller uppdateras kontinuerligt:
Bulgariska
Bosniska
Brasiliansk/Portugisisk
Katalanska
Kroatisk
Danska
Holländska
Engelsk
Estniska
Finska
Franska
Tysk
Hebreiska
Ungerska
Italienska
Litauiska
Norska
Putsa
Portugisiska
Rumänska
Ryska
Serbiska
Spanska
Spanska (Argentina)
Svenska
Turkiska
Observera att vissa språk kanske inte uppdateras till den senaste versionen, de kan innehålla några oöversatta strängar
Uppdatera gärna översättningen av ditt språk. Redigera helt enkelt motsvarande *.properties-fil som finns i installationskatalogen för HM.
Konceptet med YourTris är förmodligen något du har sett förut. ”Åh nej, inte ännu en av de där Tetris-klonerna”, kanske du tänker. Tja, ja, det är ännu ett spel som liknar originalet Tetris, men förhoppningsvis kommer likheterna mellan YourTris och andra Tetris-kloner att sluta där.
Det primära målet med YourTris är att vara ett Tetris-liknande spel som ser ut, låter och beter sig som du vill att det ska göra. Om du är en av dessa Tetris-missbrukare har du förmodligen kollat in massor av andra Tetris-spel och upptäckt att du antingen inte gillade ljudet, det var för litet, för stort eller så såg det helt enkelt riktigt fult ut. Med YourTris kommer du inte ha detta problem, eftersom du kan anpassa både ljud, utseende och beteende.
Med Table2HTML kan du enkelt konvertera en tabb- eller kommaavgränsad tabell (tabell i ett Word-dokument till exempel) till en HTML-tabell. Du kan direkt kopiera/klistra in tabellen eller ange en fil som ska konverteras. Du kan också ange teckensnittsinställningar, justering och mer i den genererade HTML-tabellen.
Denna applikation är ganska gammal och ounderhållen, men den är fortfarande tillgänglig om någon tycker att den är användbar.
Det här spelet kallas ett minispel eftersom det verkligen är… mini. Storlek på 96×44 pixlar och i endast 2 färger. Anledningen till detta minimalistiska tillvägagångssätt är att det användes som ett exempel för att visa hur ett inbyggt spel i en mobiltelefon kan se ut. Jag har gjort den tillgänglig här mest för skojs skull.
Starta spelet genom att trycka på mellanslag och styr ditt skepp med piltangenterna, mellanslag för att skjuta. Vänligen notera den mycket gamla skolans highscore ange-ditt-namn-funktionen. 🙂
Detta är tänkt att vara en liten handledning som försöker förklara vad ett CGI-skript är och hur man installerar ett på en server. Den är inriktad på nybörjare på hemsidan, utan tidigare erfarenhet av CGI-skript. Ingen UNIX-erfarenhet krävs och det antas att du bara kommer åt servern via FTP och inte med telnet.
Vad är ett CGI-script
Bara så att du vet vad du faktiskt har att göra med så kan en kort introduktion av vad ett CGI-skript faktiskt vara ett bra ställe att börja. För det första så är CGI inte ett programmeringsspråk. CGI är en förkortning för ”Common Gateway Interface”, och det är ett sätt för program och skript på webbservern att kommunicera med webbläsaren (lätt förklarat).
Vanligtvis så görs ett CGI-skript med Perl, vilket är ett tolkat skriptspråk, mycket vanligt i UNIX-operativsystemet. CGI-skript kan dock skrivas på vilket språk som helst, till exempel C++ (men då ska det kallas ett CGI-program, eftersom det är kompilerat och inte längre ett skript).
I den här handledningen kommer vi att ta itu med CGI-skript gjorda med Perl (som är det vanligaste språket som används för CGI-skript). Ett sådant skript är helt enkelt bara en textfil med ett filnamn som slutar på .pl eller .cgi.
En viktig aspekt att komma ihåg är att CGI-skript är skript på serversidan, vilket innebär att skripten exekveras på servern och endast resultatet (utdata) från skriptet visas i webbläsaren. Jämför det med JavaScript, där själva skriptet laddas ner på en HTML-sida och körs i användarens webbläsare (skript på klientsidan).
Krav
Det första du bör kontrollera när du funderar på att använda ett CGI-skript på din hemsida, är att se till att ditt webbhotell stödjer CGI-skript och att du har tillstånd att använda dem. Om du har lagt märke till en katalog som heter cgi-bin när du laddar upp dina HTML-filer, då kan du helt säkert använda CGI-skript.
Du behöver också några mer grundläggande saker som en textredigerare för att redigera skriptet (anteckningsblocket är bra) och ett FTP-program (vi använder gratis WS FTP LE i det här exemplet).
Konfiguration
Nu till det viktigaste, en av de saker som vanligtvis är källan till fel, konfigurationen av skriptet.
Öppna skriptet i anteckningsblocket eller din favorittextredigerare. Observera att det måste vara en ASCII-textredigerare som sparar som ren text, utan någon formatering, som sådant som Word och andra ordbehandlare gör.
På den första raden i skriptet ser du något sånt här:
#!/usr/bin/perl
Detta är sökvägen till perl-kompilatorn (eller snarare tolken) på servern. Detta måste ändras för att ställas in med den server du ska använda skriptet på. Förutom #!/usr/bin/perl är det vanligtvis #!/bin/perl eller #!/usr/local/bin/perl. Det bästa sättet att ta reda på den korrekta sökvägen är att kontrollera dina webbvärdars supportsidor eller titta på den första raden av tidigare installerade och fungerande skript (vanligtvis finns det något slags test Hello World CGI-skript installerat som standard).
Nästa steg är att noggrant läsa dokumentationen för skriptet och se vilka andra saker som ska konfigureras. Vanligtvis finns variabler som behöver konfigureras överst i skriptet. Läs eventuella kommentarer för att se vad du ska göra. Kommentarer i Perl är rader som börjar med #-tecknet (enda undantaget är den första raden).
En vanlig sak är att sökvägen till din webbplats måste anges. Sökvägen är inte samma sak som URL:en. Även om din URL kan vara www.foobar.com, så kan sökvägen till webbplatsen på serverns hårddisk vara ungefär så här:
/disk5/home/f/foobar/htdocs/
Observera att ovanstående bara är ett exempel, det fungerar inte på din server. Beroende på FTP-programvaran och serverinställningarna kan du kanske se hela sökvägen när du ansluter till webbplatsen med FTP. Kolla annars webbhotellets supportsidor.
Installation
Nu är det dags att faktiskt lägga skriptet på din server och ställa in rätt behörigheter för det. Detta görs med ditt favorit-FTP-program.
När du laddar upp CGI-skript så måste du använda ASCII-läge (inte binärt). Detta beror på att UNIX och Windows använder olika radbrytningar, men låt oss inte gå in på det här.
Bilden visar hur överföringsläget kan väljas i WS FTP.
WS FTP: ASCII-överföring
Vanligtvis finns det bara en plats där CGI-skript kan köras på servern, och det är i cgi-bin-katalogen. Det är där du ska ladda upp skriptet om ditt webbhotell inte har instruerat något annat.
Efter att ha laddat upp skriptet så måste du ställa in rätt behörigheter för själva skriptet och alla andra kataloger och filer som det fungerar med.
Behörigheter ställs in med ett UNIX-kommando som heter chmod, men du behöver inte vara en UNIX-guru för att använda det. Den kan användas direkt via din FTP-klient istället.
Skript bör ha en behörighet på 755 (chmod 755). I WS FTP, högerklicka på filen och välj chmod, och följande fönster dyker upp.
Exemplet nedan är för tillstånd 755.
WS FTP: chmod 755
Filer som bör skrivas till, eller kataloger själva, som skriptet använder för att spara filer i, bör ställas in på chmod 777. 777 betyder att alla rutor ska vara markerade.
Okej, det är det. Förhoppningsvis kommer du att ha ett fungerande CGI-skript igång nu…
Om det inte fungerar…
Som oerfaren användare finns det många fällor att falla i. Det tråkiga är att när något går fel är det väldigt sällan uppenbart vad det beror på. Men det finns några saker som kan hjälpa dig…
Här är några vanliga fel och vad som kan orsaka dem.
403 Tillstånd nekad
Fel 403 är en säker sak; det beror på att du har glömt att ändra filbehörigheterna för skriptet. Ställ in alla .pl- och .cgi-filer till chmod 755 för att vara säker.
404 Filen hittades inte
Du angav helt enkelt fel URL. Den faktiska filen (d.v.s. skriptet) hittades inte. Detta är samma fel som du får när du klickar på trasiga länkar.
500 Internt serverfel
Det här är det värsta, tyvärr är det också det vanligaste. Det är ett fel i själva skriptet. Gå igenom alla steg i konfigurations- och installationssektionen igen och bekräfta att de är korrekta, det borde hjälpa dig att spåra de flesta vanliga felen.
Att försöka hitta källan till ett fel kan vara lite knepigt, men det finns några användbara saker som kan vara tillgängliga för dig.
Om du har tillgång till loggfilerna på din server, hitta en fil som heter error_log och kolla i slutet av den filen. När ett skript misslyckas med att köras loggas alla fel i den filen och de bör ge dig en ledtråd om vad som händer.
De flesta webbhotell har supportsidor med vanliga frågor och instruktioner om CGI-skript. Det kan finnas vissa saker som är specifika för just ditt webbhotell, så läs igenom allt du kan hitta. Läs också dokumentationen till manuset mycket noggrant. Annars får du reda på tidigare än du tror vad RTFM betyder när du frågar manusförfattaren om något som dokumentationen täckte.
Ok, det är allt. Jag hoppas att du tyckte att denna lilla handledning var användbar…
Poff är ett roligt logikspel där du ska matcha de fallande föremålen i tre rader. Målet är att slutföra det unika målet för varje nivå.
Målet med Poff är att arrangera de fallande blocken i en rad av liknande block. När minst tre block är inriktade horisontellt, vertikalt eller diagonalt så försvinner de och alla block ovanför faller ner.
För att nå nästa nivå så bör du försöka få block att försvinna av samma typ som de staplade på varandra på höger sida av fönstret. Varje nivå har sin egen grafik och sin egen uppgift. Till exempel, i den första nivån ska du försöka tända alla bollar i granen.
Akta dig för det dåliga blocket. Vissa nivåer har ett block som gör det omvända jämfört med resten av blocken. Försök att undvika att få dåliga block att försvinna för att nå nästa nivå så snabbt som möjligt. Dåliga block kommer också att minska din poäng, så generellt sett är de riktigt dåliga.
LogMerger är ett gratis program som låter dig slå ihop valfritt antal loggfiler till en enda fil och fortfarande behålla samma kronologiska ordning.
Detta är användbart om du har en webbplats med mer än ett gränssnitt eller en klusterlösning med mer än en webbserver av belastningsbalanserande skäl, och därmed har du mer än en loggfil under samma tidsperiod. De flesta logganalysprogram accepterar bara en enda loggfil, så för att få statistik måste du slå samman de olika loggfilerna till en. Men det är inte bara en enkel fråga att sammanfoga dem, eftersom de fortfarande behöver behålla sin kronologiska ordning.
Det är precis vad LogMerger gör, beroende på tidsstämpeln i loggfilerna så slår den samman filerna och bibehåller fortfarande samma kronologiska ordning genom hela filen.
Med HTML2Table kan du konvertera HTML-tabeller utan alla HTML-taggar till komma (eller något annat) avgränsade tabeller som du enkelt kan importera till Excel eller en databas.
Denna applikation är ganska gammal och ounderhållen, men den finns fortfarande tillgänglig om någon tycker att den är användbar.
Är du trött på de där fula och svårförståeliga yahtzee-spelen? Då är DiceDeluxe något för dig! DiceDeluxe är designad för att se väldigt attraktiv ut och vara lätt att spela. Det i kombination med funktioner som ångra, genomsnittligt antal, stöd för flera spelare, ljud och en sparad topplista över de bästa 100 spelarna gör DiceDeluxe till en riktig mördare bland tärningsspelen.
Bitmap Font Writer är ett gratis program som låter dig rita text med ett teckensnitt där varje tecken ritas i en bitmappsfil.
Om du har ritat ditt eget bitmappstypsnitt i till exempel Photoshop, är du tvungen att manuellt kopiera och klistra in varje tecken för att kombinera dem till ett ord. Det här blir ganska tråkigt om du gör knappar för en webbplats, som ett exempel. Syftet med Bitmap Font Writer är att göra denna procedur smidigare.
Genom att ordna ditt teckensnitt i ASCII-ordning och sätta markörer för att definiera bredden på varje tecken så kan du ladda bilden i Bitmap Font Writer som kombinerar tecknen åt dig. Sedan kopierar du helt enkelt allt till urklippet för att få tillbaka det till ditt målningsprogram.
Programmet vänder sig till grafiker, webbdesigners och utvecklare.
All In One Yahtzee är en avancerad version av det klassiska tärningsspelet. Den innehåller varianter som original American Yahtzee, Swedish Yahtzee, Maxi Yahtzee (6 tärningar), Triple Yahtzee (3 kolumner) och Kismet (färger).
Den har sparade poäng, automatiska tips, ångra-funktion och mycket mer.
Copyright (c) Stefan Pettersson, stefpet@algonet.se
More information at https://www.stefan-pettersson.nu/scripts/
Disclaimer: No guarantees are made, use this script at your own risk Oneliner is a kind of tiny message/chatboard. People may leave small messages on your site which then can be seen by others. The 10 (your choice) last entries are always displayed.
This package should include the following files:
readme.txt – Installation instructions, Copyright, and more (this file).
oneliner.pl – Configure the top of this file.
index.html – Example page for the oneliner.
archive.html – Example page for the archive.
Oneliner is free to use as long as you provide a link back to the Oneliner page somewhere near the oneliner on your site. See the index.html file in this package for an example. Thanks! This is all I ask in return for you to use this script for free…
Features
Multiple content files
Archiving
Censoring
Spam protection
Very customizable look
Requirements
To be able to use Oneliner you must be able to install and run CGI-scripts made with Perl on your webserver. You must also be able to use SSI (Server Side Includes) in your html (or shtml) pages.
If you are unsure of any of this, ask your ISP/webhost or system administrator.
Setting up Oneliner
The first thing you must make sure, is that the first line in oneliner.pl is pointing to Perl on your webserver. By default it is:
#!/usr/bin/perl
This is usually correct, but if you get a strange error you know that this might be the problem. Another common path is #!/usr/local/bin/perl, or, just #!/bin/perl, however, your system administrator know about this.
Place the oneliner.pl file in the cgi-bin directory on your server (or where CGI-scripts may be executed). If you’re transfering the files via FTP, be sure to use ASCII because otherwise the linefeeds will be wrong. Set the file permissions of oneliner.pl:
chmod 755 oneliner.pl
You may do this from the system prompt if you’ve got telnet access to the server, otherwise you usually can do this thru your FTP-client.
In some cases it’s also required that you use chmod 777 on the directory where you choose to put the oneliner_incl.html file (which is written to by Oneliner).
Now to the important part, how to get the oneliners on your webpage. The scripts generates a file which consist of rows in a table (ie
..
).
This table part should then be included in a complete table head and foot on a HTML page together with a form.
Because it’s only the rows that is written to the file, it’s very easy to completely change to look of the output. You just change the HTML as usual.
Here is an example of how a oneliner may look like:
This line include the file with the messages. If you’ve specified any path or changed filename (see below) you must make sure that this SSI includes the correct file. If you’ve specified different files to save the messages in, this line should be modified to include the file of your choice.
Note that some servers may be configured to only allow SSI in files ending with the extension .shtml (instead of .html). In that case, simply rename the .html file.
This example is the one in the index.html file which included in this distribution. My suggestion is that you start making it work with that file, and then begin to customize.
The HTML file for the archive is similar, except that the form itself where a message is entered is removed.
Configuring Oneliner
You must configure Oneliner before you can use it. All changes are made at the top of the oneliner.pl file. Note that lines starting with a #-character in the Perl file is comments which are there to help you. Here are the following variables that you should change if they doesn’t already fit your system. A tip is to start out small with them minimum of changes and get that to work first, and then do all the major tweaking you want.
This is the file(s) where the messages will be written to, these files are the ones that should be included into a table on the HTML page. It’s important that you specify a valid path, the path is specific to your server and must be changed.
The first string is the identifier, in this example ”another” and ”default”, the second is the path. The reason you may specify more than one is because you may use the same script but have different content on different pages. Which content file that should be used is specified on the HTML page where the form is. Change the value of the following line to choose file:
In this case you may change value to value=”another” to use the other specified file. There is no limit how many files you may specify.
If no file is specified in the form, or a path for it in the script. The default file will automatically be used.
For those who wonders, it’s for security reasons you may not directly specify the actual filename within the HTML form.
Archiving
Archiving saves all entries in a file of it’s own, this nice if you want to keep track of everything that have ever been said in the oneliner. Archiving works the same way as the normal content in the oneliner, except that nothing gets deleted. The archive may then be included on a separate page that may be linked from the main oneliner for reference, or simply be kept on a secret place if you don’t want to make the archive public.
$enable_archiving = 1;
This is the line where you enable or disable the archiving feature.
This is exactly like the %files part you specified (mentioned above) before. However, this is the location of the archive files. For each file in the %files section, a archive must also be specified.
Censoring
With censoring enabled, a submitted entry will be checked to not contain any bad words (of your choice). If a bad word is found, it may either be scrambled and then accepted, or the user will be redirected to a new page, or simply nothing will happen (the entry is ignored).
$enable_censor = 1;
This is the line where you enable or disable the censoring feature.
1 (one) enables it, and 0 (zero) disables.
@badwords = (
’shit’,
’piss off’,
’fuck’
);
This is where you specify the list of words considered ”bad”. I leave it to you to go crazy coming up with bad words to put in the list. 🙂
$enable_scrambling = 1;
Enable (1) or disable (0) scrambling of bad words. Scrambling means that a bad word is replaced by a string of your choice, and then submitted to the oneliner. This way entries with bad words isn’t rejected, instead just the bad word is replaced.
$scramble_string = ’<censored>’;
The string that will replace and detected bad words. This may simply be a star ’*’ or something more extensive like the HTML in the example. The example replaces all bad words with the string ” in red.
$enable_censor_redirection = 0;
Enable (1) or disable (0) redirection to another page when a bad word is detected. When censor redirection is enabled, scrambling is ignored (because the entry is never saved).
Here you specify which page the user should be redirected to when a bad word is found. This may preferable be a page telling the user about the use of bad language and that it’s not accepted on your site.
Note that if not scrambling or redirection is enabled (both are disabled) but censoring is enabled, then an entry with a bad word will simply return the user to the page with the oneliner and the entry will not be saved.
Spam protection
Spam protection is a feature to prevent the same user to post multiple entries in a row (i.e. spamming the oneliner). This is usually done by someone who want’s to abuse the oneliner. Spam protection saves the user’s IP-adress and the time the entry was made. If the user tries to submit another entry within a certain amount of time, without another user making an entry in between, it’s considered spam.
This is the filename where the IP-adress and time is saved. This filename usually doesn’t need to be changed. By default it’s saved in the same directory as the Perl script.
$spam_timelimit = 3600;
Timelimit for what is considered spamming. That means the time that must have passwed between two entries from the same IP-adress. The value is in seconds (example is 1 hour = 3600 seconds).
$enable_spam_redirection = 1;
Enable redirection to another URL if spam is detected. 1 = enabled, 0 = disabled. If spam is detected, the user will be redirected to another page instead of going directly back to the oneliner.
Here you specify which page the user should be redirected to when spam is detected. This may preferable be a page telling the user about the policy of your site and explaining what spamming is and why the users entry is considered spamming.
Note that a user is detected by it’s IP-adress. That means that users behind a firewall will be considered as a single user because they all just have one public IP-adress visible from the Internet. If you will have users behind a firewall (for example if you’re using the Oneliner on an Intranet) you probably want to disable spam protection.
Customize look
This is the part where you may change how an entry in the oneliner will look like.
$number_of_rows = 20;
Number of messages that should be displayed at the same time. When the message count exceeds this value, the last one will be dropped when new messages are entered.
You may change the look of the date and time when it’s displayed in a news posting. You do this by using some special tags that will be replaced with a value. The following tags are available:
[sec] = seconds
[sec0] = seconds padded with a 0
[min] = minutes
[min0] = minutes padded with a 0
[hour] = hours (12h)
[hour0] = hours (22h) padded with a 0
[hour24] = hours (24h)
[hour240] = hours (24h) padded with a 0
[ampm] = display am or pm
[day] = day in month
[day0] = day in month padded with a 0
[dayname] = name of weekday
[daynameshort] = name of weekday short
maj = month
[month0] = month padded with a 0
[monthname] = name of month
[monthnameshort] = name of month short
2026 = year (4 digits)
[shortyear] = year (2 digits)
Examples:
Format: ’[monthnameshort] [day], [hour0]:[min0] [ampm]’ Result: Jan 26, 10:32 pm
The names that will be used for each weekday is specified here with a space between each name. You might want to exchange these with the names in your language for example.
@monthnames = qw(January February March April May June July August September October November December);
The names that will be used for each month is specified here with a space between each name.
$bgcolor = ’#000000’;
Background color of the entered messages, specified in hex as in HTML.
Example: #FF0000 is red, #707070 is grey, #0000FF is blue.
$font_date = ’’;
Font tag that will be used for the date. This is a regular HTML
tag.
$font_msg = ’’;
Same as above but for the actual message.
$font_who = ’’;
Same as above but for the nickname.
Customization
The look of the oneliner may be customized by you. The HTML page where the oneliner_incl.html file is included may look anyway you want, as far as it’s a correct table that the file is included into.
It’s recommended that you first use the default exampe, get it to work, and then modify it as you please.
What To Do If You Can’t Get It To Work
Unfortunately I’m not able to support you in any way. Simply read these instructions again and check the Oneliner webpage for Frequently Asked Questions which might help you, there is also a general tutorial for installing CGI-script that might be of use if you have no or little experience in installing CGI-scripts. You may also check out the forum to see if your question is answered there. If not, you may post a message and hopefully someone helpful will respond. Another option is to ask your ISP or webhost and to check their support pages.
The reason why I can’t help you is that I would probably get swamped by mails and unfortunately I haven’t got the time to answer them all. So please DON’T mail me asking for help, instead enter your question in the forum and either I or someone else will answer. Thanks for understanding.
Copyright (c) Stefan Pettersson, stefpet@algonet.se
More information at https://www.stefan-pettersson.nu/scripts/
Disclaimer: No guarantees are made, use this script at your own risk.
NewsAdmin is a program which allows you to update a webpage with news through a web interface. Done with all the different newssites in mind. You’re not limited in any special look, everything may be customized the way you want. The web interface is password protected so not anyone can post news, even if they figure out the URL.
This package should include the following files:
readme.txt – Installation instructions, Copyright, and more (this file)
newsadmin_settings.pl – Configure the script in this file
newsadmin.pl – The main CGI/Perl script
newsitem-template.html – Template for news
headline-template.html – Template for headlines
index.html – Example page which includes the news
icon-up.gif – Example image
icon-mid.gif – Example image
icon-down.gif – Example image
icon-happy.gif – Example image
NewsAdmin is free to use as long as you provide a link back to the NewsAdmin page and state on your site that it’s using NewsAdmin. The following HTML code is an example that you could use on your site:
To be able to use Oneliner you must be able to install and run CGI-scripts made with Perl on your webserver. You must also be able to use SSI (Server Side Includes) in your html (or shtml) pages.
If you are unsure of any of this, ask your ISP/webhost or system administrator.
Setting up NewsAdmin
The first thing you must make sure, is that the first line in newsadmin.pl is pointing to Perl on your webserver.
By default it is: !/usr/bin/perl
This is usually correct, but if you get a strange error you know that this might be the problem. Another common path is #!/usr/local/bin/perl, or, just #!/bin/perl, however, your system administrator know about this.
Place all files (except readme.txt and index.html) in the cgi-bin directory on your server (or where your CGI-scripts may be executed). If you’re transfering the files via FTP, be sure to use ASCII mode because otherwise the linefeeds will be wrong. Then set the file permissions of newsadmin.pl:
chmod 755 newsadmin.pl
You may do this from the system prompt if you’ve got telnet access to the server, otherwise you usually can do this with your FTP-client.
In some cases it’s also required that you use chmod 777 on the directory where you choose to put the news_incl.html and headlines_incl.html files (which is written to by NewsAdmin).
Now to the important part, how to get the news on your webpage. You’ll use SSI to include the news file and the headlines file on the webpage where you want to display the news. This is done by inserting:
<!–#include virtual=”headlines_incl.html”–>
and
<!–#include virtual=”news_incl.html”–>
The path must be the one you’ve specified (see below). An example page called index.html is included. Take a look at it to get a hang of it.
Please note that this example assumes that the *_incl.html files are located in the same directory as the file where the above SSI statements are written. If it isn’t you have to modify the the filenames to include the path also.
Note that some servers may be configured to only allow SSI in files ending with the extension .shtml (instead of .html). In that case, simply rename the .html file.
Configuring NewsAdmin
You must configure NewsAdmin before you can use it. All changes are made in the file newsadmin_settings.pl. Note that lines starting with a #-character in the Perl file is comments which are there to help you. First change the system dependent variables that you must change to get the script working. A tip is to start out small with them minimum of changes and get that to work first, and then do all the major tweaking you want.
News configuration
These are configuration options that specify the number of news and headlines that will be displayed.
$number_of_news = 20;
Number of news that should be displayed at the same time. When the news count exceeds this value, the last one will be dropped when new news are inserted.
$number_of_headlines = 8;
Like the one above except that this is for headlines.
Output files
It’s very important that the output files are configured correctly. These are the files where the actual news and headlines are written. Please note that the path and filename in the examples are made up and you must configure them to suit your system. Please note that path and URL is not the same thing (but you did know that, right? :-)).
$news_file = ’/www/news_incl.html’;
This is the path (not URL) to the file where the actual news are written. The specified file is the one you’ll include in the html document where you want the news to be displayed.
This file and the one for headlines does not need to be created. The script will create them automatically if they don’t exist.
$headlines_file = ’/www/headlines_incl.html’;
Like above except that this one is for the headlines.
Templates
Specifies the location of the template files. If they’re located in the same directory as newsadmin.pl then no path needs to be entered.
$newsitem_template = ’newsitem-template.html’;
Template which describes how an inserted news item will look like. See below under customization for more information of how to use templates.
$headline_template = ’headline-template.html’;
Template file for headlines.
Date format
Specify how the date and time will be displayed in news posts.
You may change the look of the date and time when it’s displayed in a news posting. You do this by using some special tags that will be replaced with a value. The following tags are available:
[sec] = seconds
[sec0] = seconds padded with a 0
[min] = minutes
[min0] = minutes padded with a 0
[hour] = hours (12h)
[hour0] = hours (22h) padded with a 0
[hour24] = hours (24h)
[hour240] = hours (24h) padded with a 0
[ampm] = display am or pm
[day] = day in month
[day0] = day in month padded with a 0
[dayname] = name of weekday
[daynameshort] = name of weekday short
maj = month
[month0] = month padded with a 0
[monthname] = name of month
[monthnameshort] = name of month short
2026 = year (4 digits)
[shortyear] = year (2 digits)
The names that will be used for each weekday is specified here with a space between each name. You might want to exchange these with the names in your language for example.
@monthnames = qw(January February March April May June July August September October November December);
The names that will be used for each month is specified here with a space between each name.
$timezone_offset = 0;
If the server is in a timezone different than yours, then the default server time may display wrong (for you). You may modify the time in seconds.
Examples:
$timezone_offset = -3600;
Minus 1 hour.
$timezone_offset = 1800;
Plus 30 minutes.
News images
News images is a way to display an already predefined image together with a news post. How it is displayed is customized in the template. For example it may display an image depending on the subject, or it may display a small icon in the headline.
$enable_images = 1;
This is the line where you enable or disable news images. 1 (one) enables it, and 0 (zero) disables. If disabled the image field field will not appear when posting.
This is where you specify the images that should be available when making a news post. The first line is there to provide an option to not choose any image at all. The string to the left is the URL that will be used for the image, while the string to the right is the description that will show up in NewsAdmin and in the image’s alt-tag.
Password
You may have as many passwords as you like if you want more people than yourself to have the possibility to do news posts. By giving out an unique password to each person you may then simply remove it if you want to disable that person from posting without affecting the other persons.
$enable_password = 0;
This is the line where you enable or disable password authorization. 1 (one) enables it, and 0 (zero) disables. If disabled the password field will not appear.
@passwords = qw(
secretpassword
supersecret
);
This is where you specify which passwords that should be used to allow someone to do a news post or any other action. In the above example there are two passwords, ”secretpassword” and ”supersecret”. You may add or delete as many passwords as you wish. Passwords are ignored if password authorization is disabled.
NewsAdmin Internal
This is where configuration is made for things used internally by NewsAdmin. Usually you don’t need to change anything here.
$index_file = ’newsadmin_index.dat’;
This is a datafile that NewsAdmin uses internally. It should work as it is, simply putting the file in the same directory as the script itself.
Customization
The look of the headlines and news which are inserted may be customized by you. This is done by changing the template files. You simply use standard HTML but include some special tags that will be replaced by author name, date, headline, etc. See the examples which is originally distributed with NewsAdmin.
Headline template: The headline template is used when writing to the headlines file which is simply a link to the actual news item.
News template: This is the actual news, it works exactly the same way as the headline template.
Here are the special tags which is used in the templates:
[%NA-ID] – Will be replaced by a unique id which is used to
link to the newsitem on the page. Used in headline.
[%NA-HEADLINE] – Headline
[%NA-TIMESTAMP] – Date
[%NA-TEXT] – The text itself
[%NA-EMAIL] – Email
[%NA-AUTHOR] – Author name
[%NA-IMAGE] – Is replaced by the selected news image. If no image is choosen it’s simply removed. What’s inserted is actually an <img> tag poiting to the specified URL for the choosen image.
It’s recommended that you first use the default templates to make sure everything works, and then modify them as you like to make them fit your own design.
How To Use NewsAdmin
If you’ve succesfully installed NewsAdmin, you may simply enter it’s url in your browser to get going. If you’ve installed in cgi-bin on your site you’ll call it with: http://www.yourdomain.com/cgi-bin/newsadmin.pl
How the exact URL will be is of course depending on your system and where on your site the script is installed.
Navigation
Navigating NewsAdmin is pretty simple. It works like a tabbed window in Windows. Simply click on the links at the top to switch between Post and Delete mode.
Post
This is where you post news. Simply fill in the informationand click Post to post the newsitem directly. Preview let you see it without actually saving the data. Depending on your settings the password and image field may or may not be displayed.
Options: Currently there is only one option in NewsAdmin.
Convert double linefeeds into HTML
This option will convert double linefeeds (ie you press RETURN two times in a row) into a <P> tag. The result is that the double linefeed actually is displayed on the HTML page.
Delete
This is where you may delete already posted news. Simply select the post you want to delete and click the Delete button. Depending on your settings the password field may or may not be displayed.
What To Do If You Can’t Get It To Work
Unfortunately I’m not able to support you in any way. Simply read these instructions again and check the Oneliner webpage for Frequently Asked Questions which might help you, there is also a general tutorial for installing CGI-script that might be of use if you have no or little experience in installing CGI-scripts. You may also check out the forum to see if your question is answered there. If not, you may post a message and hopefully someone helpful will respond. Another option is to ask your ISP or webhost and to check their support pages.
The reason why I can’t help you is that I would probably get swamped by mails and unfortunately I haven’t got the time to answer them all. So please DON’T mail me asking for help, instead enter your question in the forum and either I or someone else will answer. Thanks for understanding.
Vi använder cookies för att se till att vi ger dig den bästa upplevelsen på vår webbplats. Om du fortsätter att använda denna webbplats kommer vi att anta att du godkänner detta.